

Tools & Workspaces
What does it take to identify different types of forensic evidence in locks? In truth, a surprisingly small amount of tools. Care is taken to select the proper tools and workspace for a laboratory investigation so that evidence is preserved and false evidence is not created. Remember, proper handling and disassembly of the lock is equally important to the choice of tools.
For more information on the investigative process and how these tools are used, please visit the Forensic Investigation page.
Plug Followers
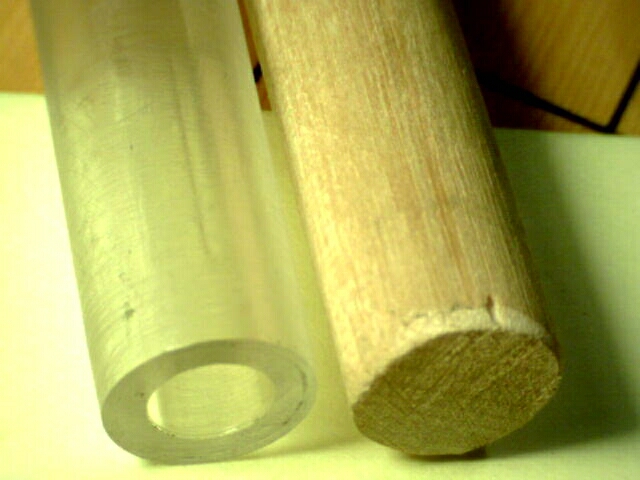
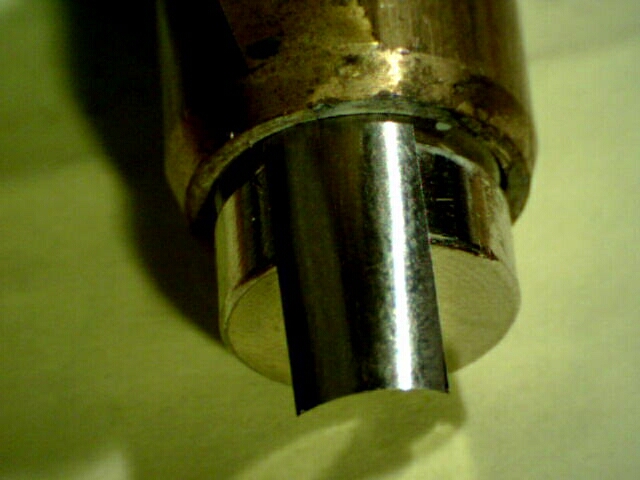
In most of the world the pin-tumbler cylinder is king. Proper disassembly of the pin-tumbler requires a plug follower be used. This tool pushes the plug out of the cylinder while holding top pins and spring in the upper cylinder chambers. When used for forensics, plug followers must be wood or plastic to prevent creating false evidence.
Shims
Shims are a tool used to open pin-tumbler cylinders for investigation. Shims are small, thin strips of metal that are inserted into the back of the lock. A blank key is used to raise all pin stacks, then is slowly withdrawn to allow the shim to split pin stacks at the shear line. The use of a shim is somewhat invasive, but may be preferred to destruction of the cylinder in some cases.
Tweezers
Tweezers are an absolute necessity when dealing with the small pieces of a lock. Trying to work with components by hand is almost sure to result in problems. The key to using tweezers in an investigation is that, like plug followers, they must be plastic. When working with the small components of the lock a pair of metal tweezers, no matter how polished and smooth, will create false evidence. Plastic tweezers are inexpensive and I would recommend a variety of shapes so that you can determine what you prefer.
Microscope
Microscopes are essential in tool mark identification and other laboratory work. You have the choice between a manual and digital microscope, with most modern manual microscopes having a camera port that can be used to connection a digital output device. Digital microscopes are cool because they connect directly to a computer and function a bit like a high power webcam. Some things to note:
- You need a "top lit" microscope, commonly called a metallurgy or jeweler's microscope. Do not buy a biology microscope (bottom lit).
- Magnification should go to at least 20x, but preferrably 100x or higher. The extreme close up pictures on this site are in the 200-220x range.
- Digital microscopes are considerably cheaper, but manual microscopes are generally better quality. Most pictures on this site are from digital microscopes.
If you are doing high profile investigative work you might also consider a comparison microscope. Comparison microscopes have two sets of optics that combine in the viewer so you can do instant side by side comparisons. This is great for tool mark comparison, but not altogether necessary in most investigations. Note: This is only useful to the investigator; in your investigative report you place images together for comparison purposes.
A scanning electron microscope (SEM) is recommended if you have access to or own (!) one. The SEM can produce extremely high quality images of material residue, tool marks, and various other forensic evidence. Unfortunately, due to the expense of owning or renting one, not all forensic locksmiths can take advantage of them. Manfred Göth has a number of great SEM photos on his site.
Cameras
Without getting into a holy war, all medium to high quality cameras are suitable for forensic locksmithing. The brand and model chosen is a matter of personal preference, and the quality of pictures will largely depend on the skill level of the photographer. A ring strobe, filter kit, and tripod are recommended for use with locks and crime scene photography.
Depending on where you live, courts may prefer that you use a non-digital camera. This is due to a somewhat archaic idea that non-digital photographs are harder to manipulate, thus more secure. Personally, I find this a bit silly considering we are in an age where technology to manipulate any type of photography is abundant, if not downright overwhelming.
If your camera will be mounted to your microscope directly (I prefer the digital connection, personally), you'll need to ensure that a mounting piece is available or can be manufactured. There are a few companies that specialize in making custom mounting pieces, and it is generally not too expensive.
Lighting
Proper lighting is essential to identifying forensic evidence on components. I would recommend trying a variety of light sources until you find a set that meets your needs. As you can see from the pictures on this site, I use varying intesity and color light sources. I also recommend buying an inexpensive Ultraviolet A (UVA) light source. Even the $20 handheld UVA devices are suitable for the purposes of forensic locksmithing.
Hand Tools
Hand tools, besides those listed above, are usually in the form of saws to cut pieces of the lock apart for further investigation. A thin, fine-tooth hacksaw is used to cut the plug into thirds. This can also be used to disassemble padlocks, but the process is rather time consuming.
Power Tools
In general, power tools are only used when destructive disassembly is an absolute necessity. In this case, you must be careful to understand where anti-destructive features of the lock are located, as hitting these points with a power tool may be dangerous to the disassembly process as well as to you. Power tools may include dremels, drills, saws (including a jeweler's saw), and milling machines.
Misc. Tools
Here are some other tools that are invaluable in laboratory work:
- Pinning trays
- Reference materials (keyway, pinning, factory-original data)
- Micrometer, caliper, ruler (wood/plastic)
- Vise (with plastic/rubber inserts) and lock cylinder holder (plastic)
- Notebooks, pens, pencils, colored markers
- Allen wrench (hex key) set
- Screwdriver (Flat and Phillips) set
- Rubber mallet
- Scotch, masking, and electrical tape
- Modelling clay (used to hold components under microscope)
- Selection of common key blanks in your area/country.
Forensic Workspaces
The place you choose to do your laboratory work should be separate from your normal workspace. Using anything but a clean, prepared workspace will cause problems down the road. How many times have you been working with locks and dropped a pin, a spring, or even the whole lock? Combining the dust, dirt, and spare parts of your normal workspace with a forensic investigation is a terribly bad idea. My recommendation, if you are doing this professionally, is to own or rent a workspace that you use only for investigative work. Many companies specialize in this sort of thing, they are usually called "clean rooms."
Things to remember:
- Always wash your hands prior to doing laboratory work.
- Always clean tools prior to doing laboratory work.
- Never use tools that may contaminate evidence (see above).
- Photograph your progress through the laboratory investigation.
- Document all actions performed during laboratory investigation.
- Always examine components before cleaning them in any way.
- If components are washed, save the wash in case it contains foreign objects.